
Today we have a beautiful tutorial for you from Laetitia from our design team. She combines spring-like design paper, cute dies and a grey cardboard set to create this little work of art that you can fill with your precious memories.


Material:
- Design paper 'Forsythia tendrils' (2 sheets)
- Design paper 'Dot grid black'
- Grey cardboard cut-outs 'Heart window'
- The 'plug-in branch'
- The 'Layered Animal Rabbit 3'
- The 'Mini Chick Set 2'
- The 'Negative Flower 5'
- yarn
Tools:
- Scissors
- Glue
- Set square or ruler
- needle
Step 1
The cover
Cut the design paper 'Forsythia tendrils' to a size of 25.5 x 19 cm and the design paper 'Black dot grid' to a size of 20.5 x 19 cm .


Glue and sew the two pieces together with an overlap of 0.5 cm .

Step 2
The heart
Cut the boxes as follows:
A: 12 cm (heart cardboard and thick cardboard)
W: 11.5 cm (thin cardboard)
C: 2.5 cm (thin cardboard)
D: 2.2 cm (thin cardboard)
Place the cardboard pieces on the back of the patterned paper as shown in the picture and glue them in place.

Fold the outline. Cut out the inside of the heart and glue it as shown in the photo.


Cut a piece of forsythia paper measuring 11.5 x 15.5 cm . Sew along the edge (optional).
Trace the heart shape and cut out the outline.

Step 3
The pocket
Cut a piece of dotted design paper measuring 19 x 10 cm and fold it along the dotted line. Then apply glue to the marked places and stick it as shown.
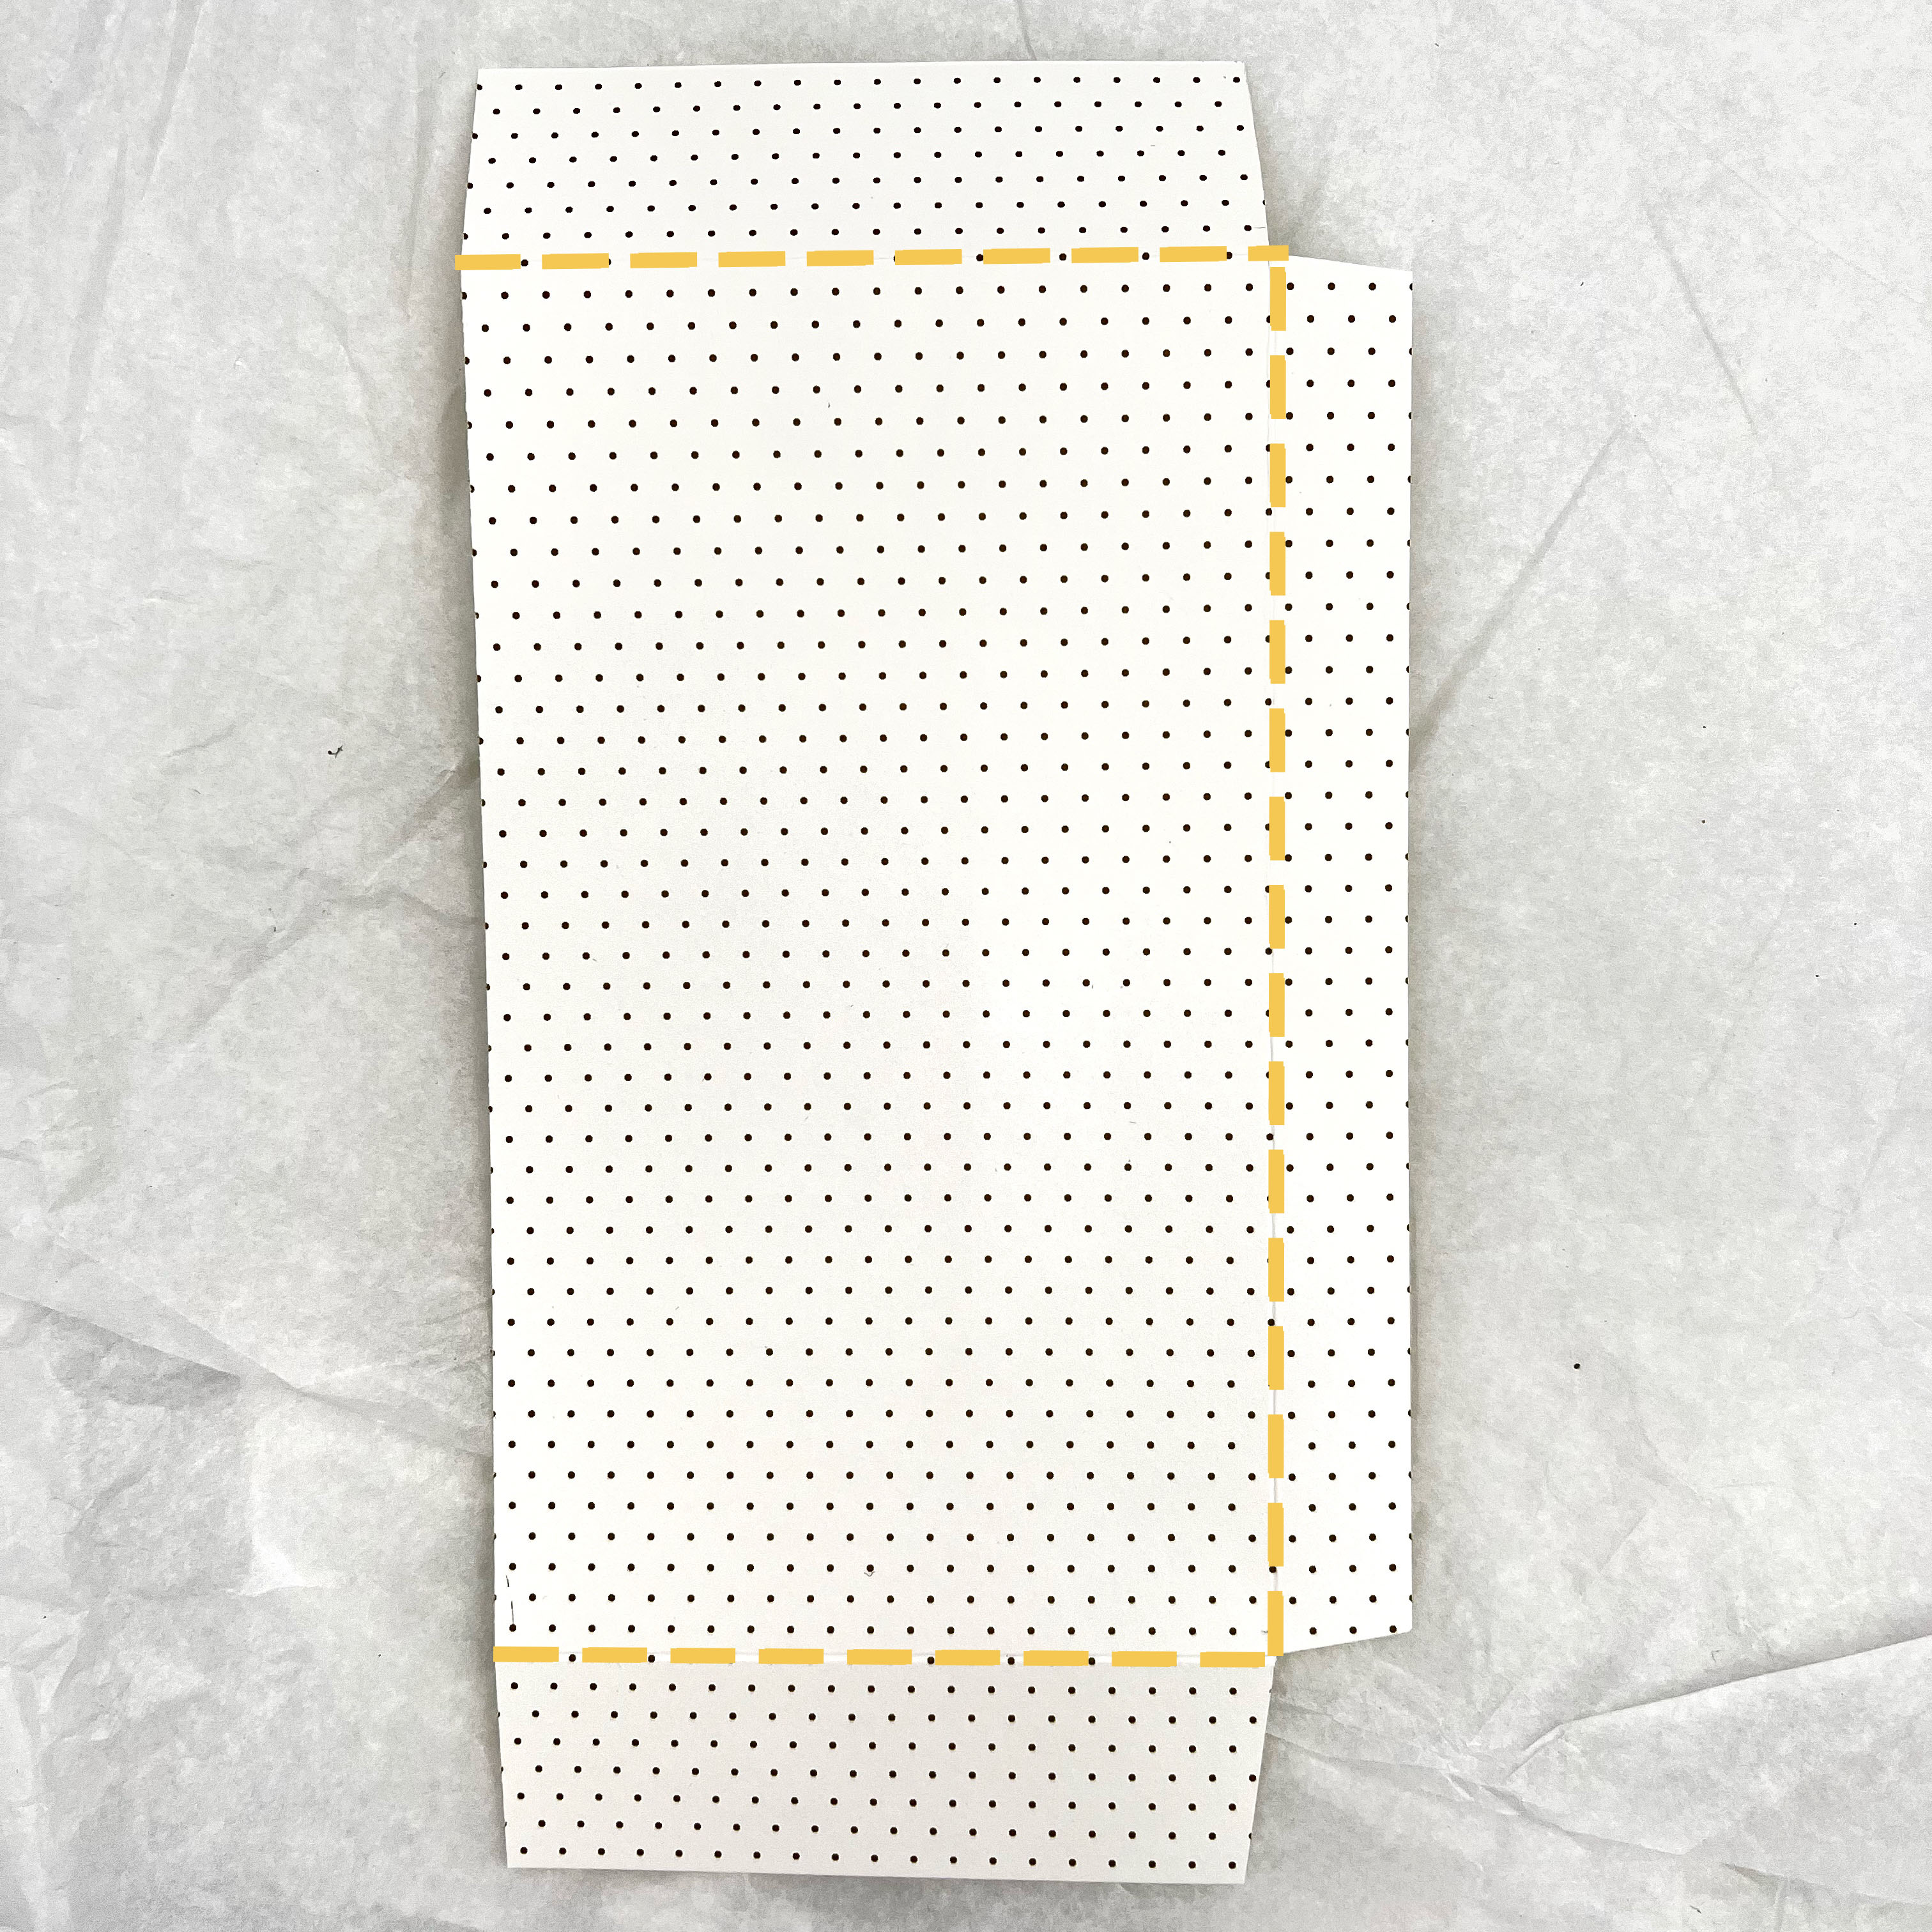


Cut out a 11.3 x 30 cm piece of polka dot paper and fold it along the dotted line.
Fold and glue the next two steps exactly as shown in the photos.
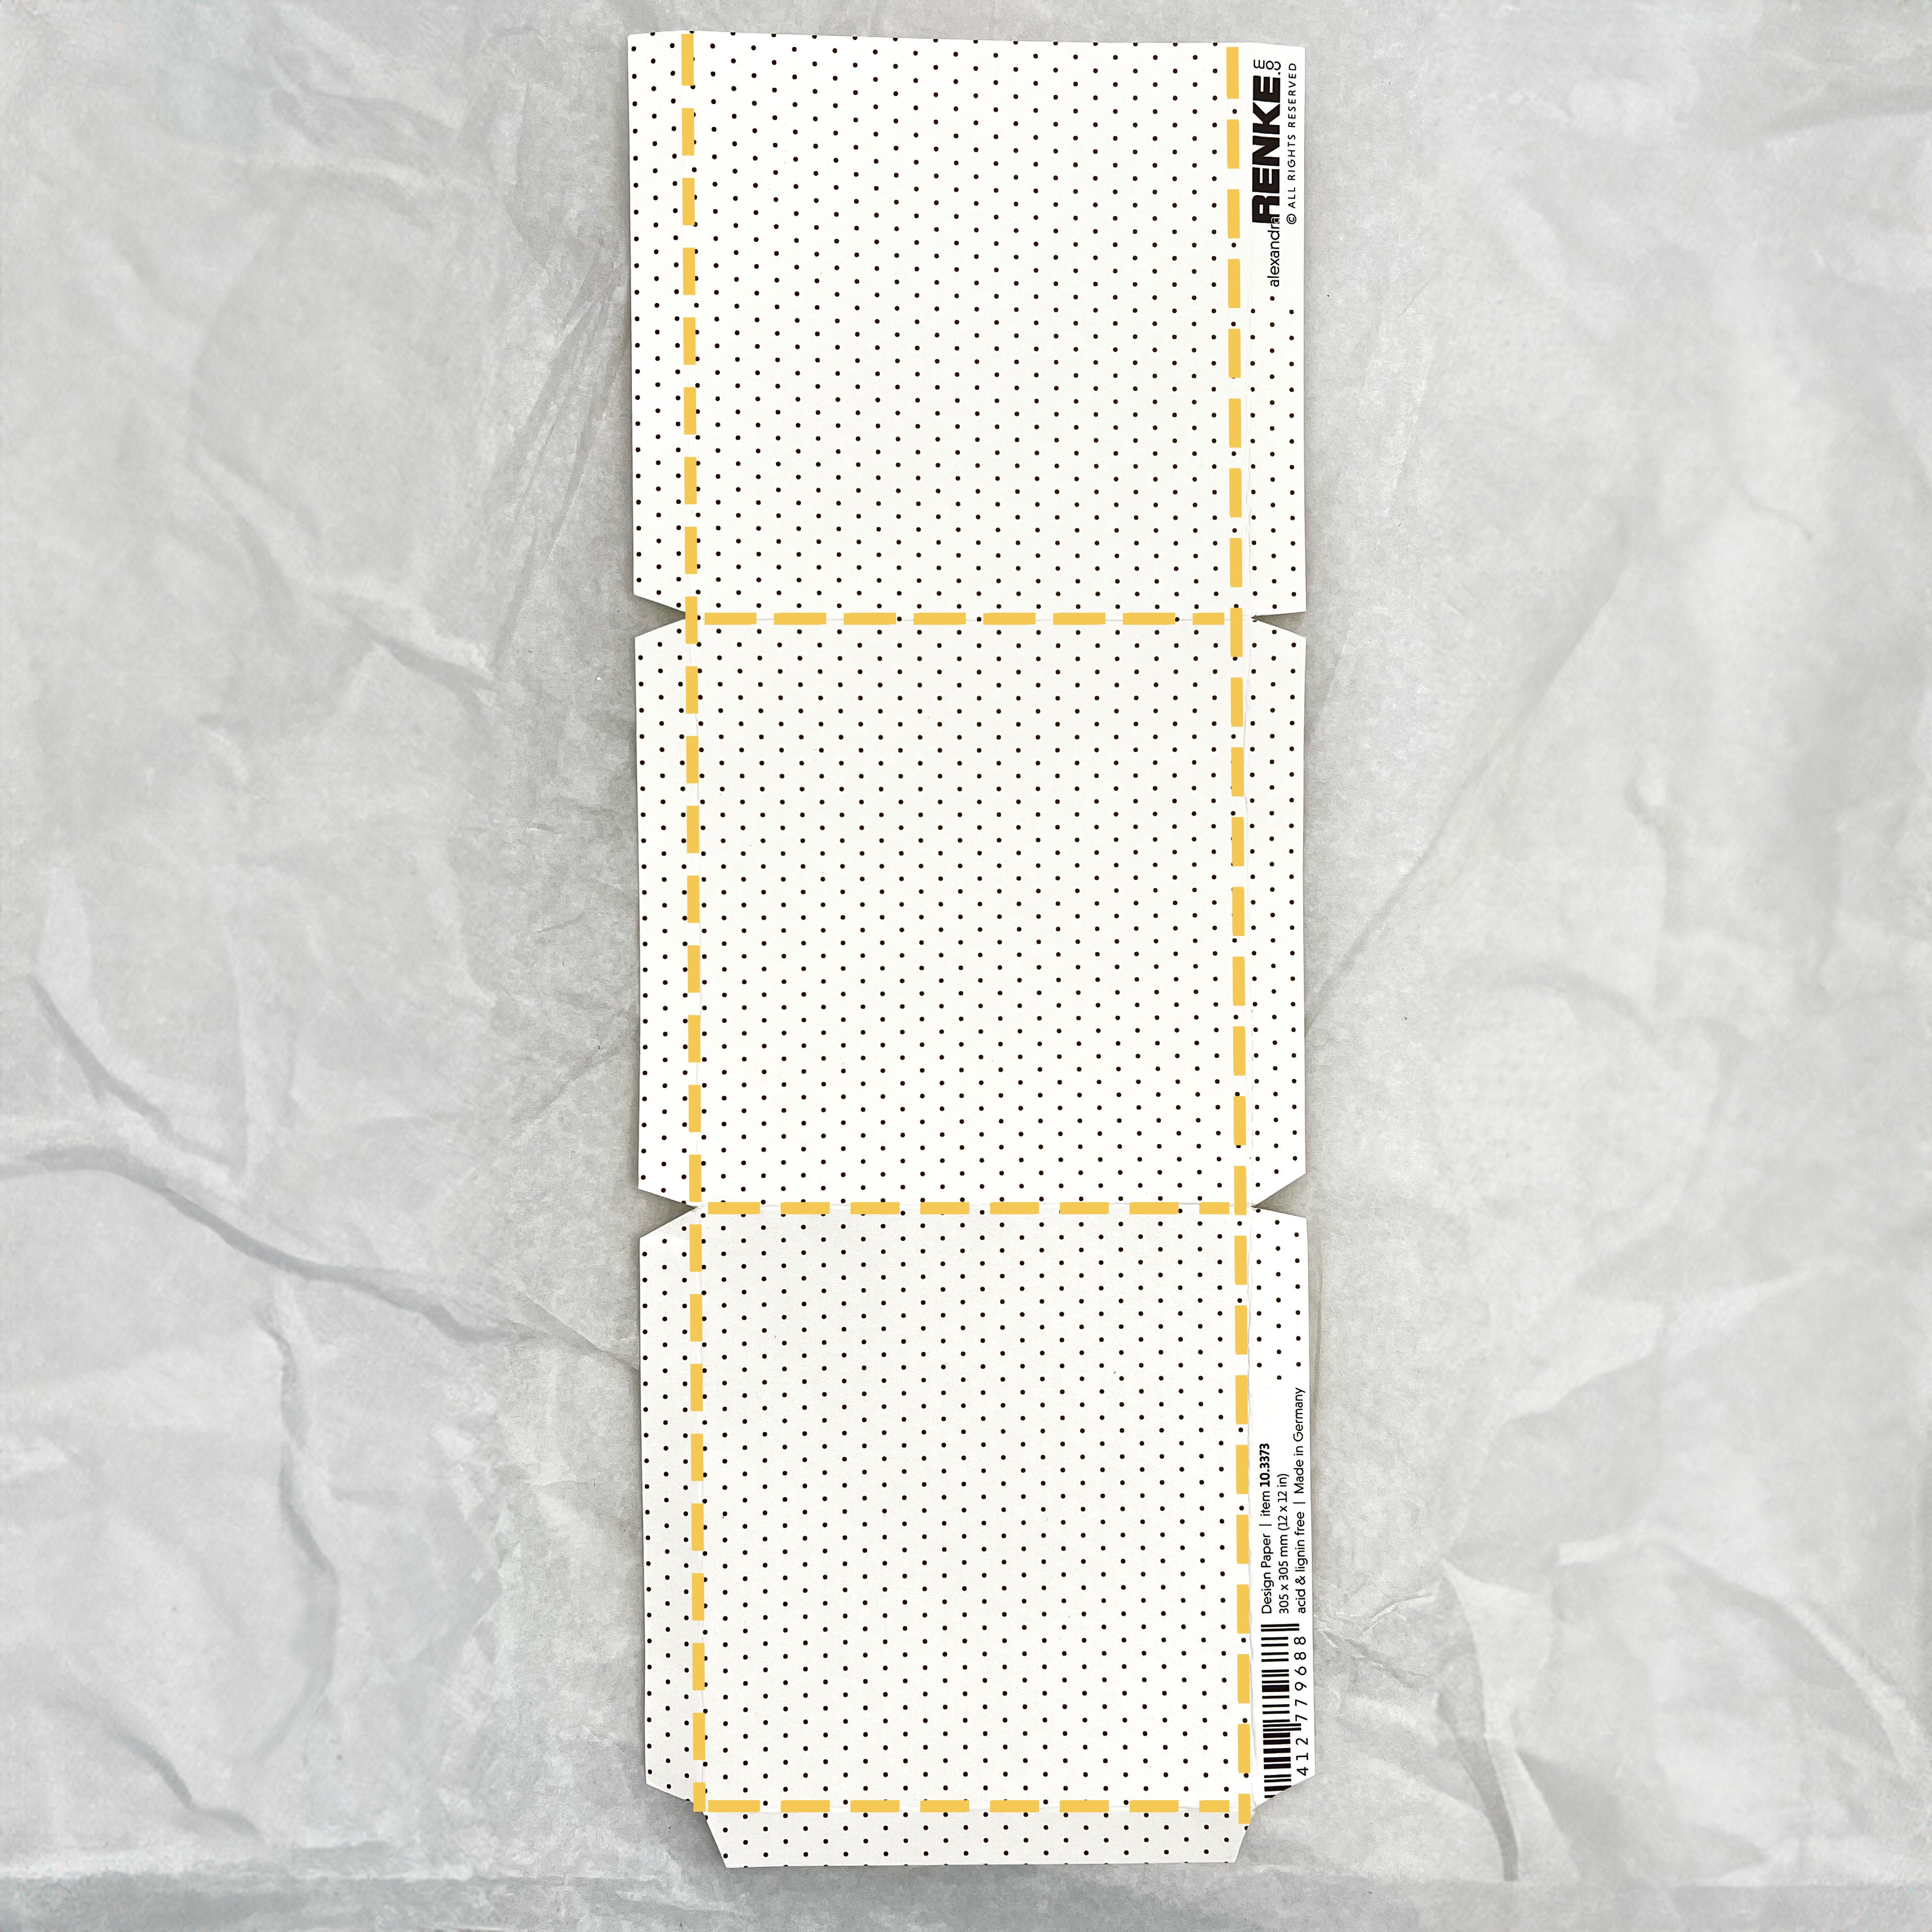


Cut two pieces of patterned paper, each measuring 9.6 x 4 cm , and fold them.
Glue the three pieces together and the pocket for the inside of the mini album is ready.


Before gluing the pocket to the inside of the album, cut out a piece of forsythia paper measuring 30 x 15.5 cm and glue it in place.


Step 4
The decoration
Make the layered bunny, the mini chick, the negative flower and the intertwined branch and glue them to the inside and outside of the album.

This is the result! Laetitia also put a small notebook measuring 14.5 x 10.5 cm inside.


A ribbon can be attached to close it.


Laetitia used watercolors and colored pencils to color the little animals.

And done!
What do you want to collect in your mini album?
We hope you enjoy making this recipe.
From us to you ⭐
Laeti & Graphics Team
For more tutorials, follow Laetitia @ laeti_booo on Instagram.
22 comments
Ich freue mich, diesen Mini für Sie gemacht zu haben! Ich wünsche Ihnen viel Spaß beim Scrappen mit den wunderbaren Produkten von Alexandra Renke.
Wundervolle Idee und Zusammenstellung der Farben! Gelungenes Album – ein Augenschmaus 😍
Was für ein traumschönes Minialbum. Alles ist so stimmig und passt wunderbar zusammen. Das muss ich unbedingt nachwerkeln. Danke für die detaillierte Anleitung. ❤️
Eine tolle Anleitung 🤩, die zum Nachbasteln inspiriert.
Vielen Dank 😊😘
Sehr süß!