Skip to content

Techniques and things to know

titelbild stencil butter in verschiedenen farben

Technical knowledge – Pastes and Stencil Butter

Discover TCW's versatile pastes! Tips, tricks, and application information for the perfect shimmer and shine in your DIY projects.

titelbild schablonen mit kartenauflegern

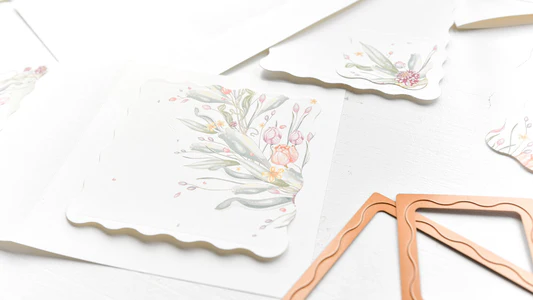
How do I cut a wreath? Using a DIY stencil

No more fear of big motifs! Find the perfect cutout for your card motif using self-made stencils.

Titelbild Pappcut

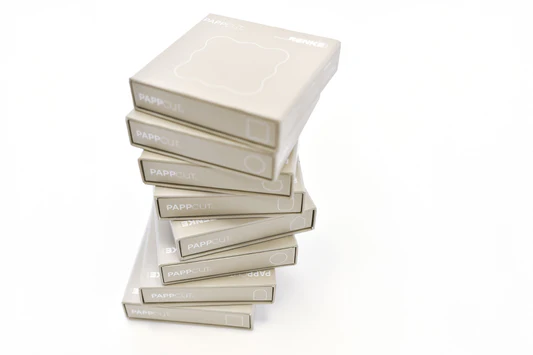
PAPPcut®, PAPPcuties and Dies

Our new PAPPcuts® and PAPPcuties® are super versatile when used and handled correctly - so that you can really get to know (and love) them, we will explain to you here exactly how to use them correctly with our punching and embossing systems!

Titelbild

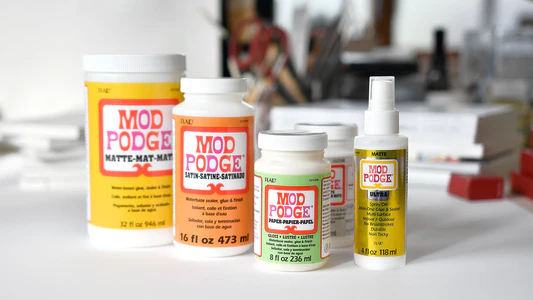
Mod Podge - more than just a glue

An overview of the different Mod Podge products, their diverse applications, our tips, tricks and inspiration for craft projects.

titelbild ösenstanzer

Technical Know-How • Fiskars eyelet puncher

A true all-rounder! To set an eyelet and create holes quickly and easily without any additional tools, we recommend the Fiskars eyelet punch.

Embosster Stempel - Wishing you a wonderful day

Technical Know-How • Embossed with Silke Roßmüller

How to use Embossing Powder? We've almost all asked ourselves this question at some point... Our dear Silke has written down the basics for embossing powder for you!

Technikkunde • Tacky-When-Dry Gel Medium

Technical Know-How • Tacky-When-Dry Gel Medium

Today we would like to present you a wonderfully versatile medium: the “ Tacky when dry ” gel! Have you ever had this in your hand and not really been able to do anything with it?   Our dear Jana from the design team took the time to explain to you in detail different ways to use this gel. Overview To demonstrate the versatility of the medium, she has prepared a variety of materials:   Vellum, kraft paper, our house collection , some canvas fabric, various aRenke stencils, a painting knife and foil. Use on fabrics First, Jana cut the canvas into narrow strips and cut a fishtail at the bottom. The stencil shown is “ Dissolving Butterflies ” in Din Lang format. The stencil is fixed with some washi tape. Then carefully brush the gel through the stencil with the painting knife . The moisture can cause the fabric to curl up a bit, but this is no longer a problem once it dries.   It is important to let the gel dry completely. Only when it is completely transparent can you continue working with it. This applies not only to the fabric, but to every application, regardless of the material. For the butterflies, Jana chose the “ Berry ” & “ Orange ” hot foil, cut off a small piece and placed it on the dried medium.     “Since the material has a lot of texture, I often had to rub it with pressure. But honestly, I like the messy look and so it doesn't bother me that the butterfly isn't completely filled in. I mixed the foils and was able to achieve a really great two-color result.” Tip: The canvas strips are only used for decoration or for further processing in other projects. You shouldn't wash the strips. Other materials Next, Jana spread the gel on the remaining materials. As always: wash your tools and stencils immediately after use and let the medium dry properly! “I wanted to spruce up a kraft paper envelope and placed the stencil on the back. A really great effect, but see for yourself…” To prevent the stencil from slipping, it should be fixed again with some washi tape. Use the painting knife to carefully brush the gel through the stencil and place it to the side to dry.   Tip: If you open the envelope, you can prevent it from sticking together. When the medium is completely dry, it can be refined with the foil. Cut the foil to size, place it on the sticky (dry) gel and rub it well with your finger. It can be used until there is no more colored film left. Experience has shown that the gel takes a little longer to dry on Vellum and the moisture can cause it to curl a little. But once everything is well dried, you can achieve great effects and the waves mostly disappear after drying. “I like to punch out decorative elements from the papers I have prepared. That always gives the whole thing a little something extra. Now in the fall there are leaves that can be used straight away for the next project.” We hope that we were able to give you some ideas for your next creative time and that you “ Tacky when dry ” Gel Medium will be tested.   We can really only recommend it, it's a great pleasure to work with and the results are always convincing!   From us for you ⭐ Jana & Dina Facebook Pinterest Email

Technikkunde • Kreisschneider

Technical Know-How • Circle cutter

Hello, today we are testing the Circle Cutter from Vaessen Creative for you. Overview When you unpack it for the first time, you will find the following parts: The circle cutter, a white cap and short illustrated instructions. Prepare the Circle Cutter To get the cutter ready for your first circle, proceed like this: To get the desired diameter, first loosen the positioner and move it - then be sure to lock it again! Next, turn the control wheel for the knife until it no longer works, thereby directly securing the knife. Usage Now you are ready for the first circle. Place the circle cutter on your paper and be sure to use a cutting mat or something similar, the blade is very sharp and will otherwise damage your table. Hold the cutter firmly and press the small notch “push” and then turn until the circle is completely cut out.   You can put the white cap on the positioner and also use this device for guidance. Example For example, if you want to cut out the exact center of a 12x12 sheet of paper, the easiest way is to determine and mark it beforehand by measuring it with a ruler.   On the circle cutter itself you will find a centimeter measurement from 0 cm to 15 cm and the middle, marked by a cross. Now place this cross on your previously marked spot and cut out the circle perfectly in the middle of the 12x12 paper. Other information The diameters of the circles range from 2.5 cm to a maximum of 15 cm. According to the manufacturer, the thickness/weight of the paper must not exceed 250 g. The three replacement bells that come with the circle cutter are well hidden. They are located on the bottom under the rubber protection. You can get more replacement blades here Closing words My personal opinion about this tool: I like the ease of use and the design. It lies well on the paper and turns wonderfully. Changing the knife is easy and you get three replacement blades, great! The diameter can be set with millimeter precision and easily adjusted. From us for you ⭐ Jana Facebook Pinterest Email